Home EV Charging in the Charleston Area
Home EV Charger Installation in Charleston, SC
Bought an EV and not sure what you need? We help you choose the right charger, confirm whether your electrical panel can support it, install the dedicated 240V circuit, and coordinate the permit and inspection. You never have to learn what a load calculation is — that part is our job.
Bring your own charger or let us supply one · Tesla Wall Connector and other major compatible brands · 2-year workmanship warranty
EV charging specialists
Chargers are what we do all day
Licensed electrical professionals
Work done on the record
2-year workmanship warranty
On the work we install
Transparent pricing
Clear scope before we start
Permitting & inspection coordination
Handled for you
Charleston-region home installation
What Should You Check Before Installing a Home EV Charger?
For homes in Charleston, Berkeley and Dorchester counties, start with your installation address, EV make and model, and photos of the electrical panel and parking spot. More Miles EV uses those details to review your charging needs, wiring route and available capacity before recommending a setup. Your local permitting authority and the work involved determine the permit and inspection requirements; we coordinate them as applicable.
- Check the electrical supply first. The U.S. Department of Energy explains that Level 2 charging needs a suitable 240V supply and that an electrical contractor can assess whether a home has adequate capacity.
- Match equipment to the parking location. For a driveway or carport, choose equipment rated for outdoor use. For a detached garage, we also review the existing power supply and whether new wiring or trenching is needed.
- Confirm the scope before work starts. Your estimate should explain the charger connection, circuit work, wiring route, and any necessary panel work, plus permit and inspection coordination.
Source: U.S. Department of Energy: charging electric vehicles at home. Local requirements and your charger manufacturer's instructions still apply.
Direct answer
What Does a Home EV Charger Installation Include?
A home installation is the charger plus everything behind it: reviewing your car and how you drive, assessing your panel and service, running a load calculation, sizing the charger and circuit, choosing the placement and wiring route, recommending hardwired or plug-in, installing a dedicated 240V circuit, coordinating permitting and inspection as applicable, testing and configuring the charger, documenting the work with photos, and walking you through how to use it.
Your vehicle and charging goals
What you drive, how far you go on a normal day, and when the car is parked and free to charge.
Electrical panel and service assessment
We look at your service size and what is already connected — not just how many empty slots exist.
Load calculation
A proper calculation shows how much capacity your home really has left for charging.
Charger and circuit sizing
We match the breaker, wire and charger current to your car and your panel.
Placement and wiring route
Where the charger lives, and the cleanest, best-protected path for the wiring to get there.
Hardwired or plug-in recommendation
We tell you which suits your charger, your location and the applicable code — and why.
Dedicated 240V circuit installation
The charger gets its own circuit, installed to code, instead of sharing with something else.
Permitting and inspection coordination
Where a local permit and inspection apply, we pull and schedule them as applicable.
Testing, setup and documentation
We confirm the charger is configured to the right current, test real charging, and photograph the work.
A short walkthrough with you
How to plug in, how to schedule charging, and what to do if anything ever looks wrong.
The question everyone asks first
Do I Really Need Level 2?
Most new EV owners start by plugging into a standard 120V household outlet with the connector that came with the car. That works, and for a short commute it may be all you ever need.
Worth clearing up: a mobile or manufacturer-supplied connector is not automatically Level 1 only. Some can also operate at 240V when a suitable outlet exists. So the real comparison is standard 120V charging versus a properly installed 240V Level 2 circuit sized for your car and your home.
Level 2 is not really about a bigger number. It is about recovery speed and convenience: a full day of normal driving replaced comfortably overnight, so you leave every morning ready and stop planning your week around charging.
Typical home charging power
Illustrative figures to help you compare setups.
- Standard 120V outlet (Level 1)About 1.4–1.9 kW
Often roughly 3–5 miles of range per hour
- Level 2 — 32A circuitAbout 7.7 kW
A comfortable overnight setup for most drivers
- Level 2 — 40A circuitAbout 9.6 kW
Good fit for larger batteries and longer commutes
- Level 2 — 48A circuitAbout 11.5 kW
Fastest common home setup, when the panel and car support it
Actual charging speed depends on your vehicle and its onboard AC charger, battery size, state of charge, circuit capacity, the charger itself and efficiency. These figures are for comparison, not a promise for a specific car.
Sized, not oversold
We Size the Charger to Your Car and Your Home
Here is the part that saves people money: your EV has its own built-in limit for how fast it can accept AC charging at home. If your car tops out below what a big circuit can deliver, a bigger circuit does not make it charge any faster. You would be paying for capacity the car will never use.
So we work in the other direction. We start with what your vehicle can actually accept, compare that to what your panel can support, and then plan the circuit — commonly around 32A, 40A or 48A for home installations. Not every home has capacity for the highest option, and not every vehicle would benefit from it.
If your car can use more later, or you replace it with one that can, a charger with adjustable current gives you room to move without redoing the wiring.
How we plan the circuit
- 32A circuit — about 7.7 kW
- Plenty for many drivers, and often the easy answer on a panel with limited headroom.
- 40A circuit — about 9.6 kW
- A good middle ground for larger batteries or longer daily driving.
- 48A circuit — about 11.5 kW
- The fastest common home setup — useful only where both the vehicle and the electrical service support it.
We confirm what your specific vehicle and panel support before recommending any of these.
Panel capacity
Do I Need a Panel Upgrade?
Usually not. Many homes in the Charleston area already have enough capacity for a Level 2 charger once we look at the numbers properly.
The most common misunderstanding here is about empty breaker spaces. Room in the panel is not the same as available electrical capacity. What matters is how much of your service is already committed to the things you run today — heating and cooling, water heater, range, dryer, pool equipment — and how much is genuinely left over.
That is what a load calculation and service assessment tell us. We do it before recommending anything, so the answer is based on your home rather than a rule of thumb.
If capacity looks tight, there are usually options before replacing the panel: set the charger to a lower current so it still fills the car overnight, add load management so charging backs off when other large appliances are running, or use scheduling and power sharing where that suits the equipment. We reach for an upgrade only when it is genuinely necessary.
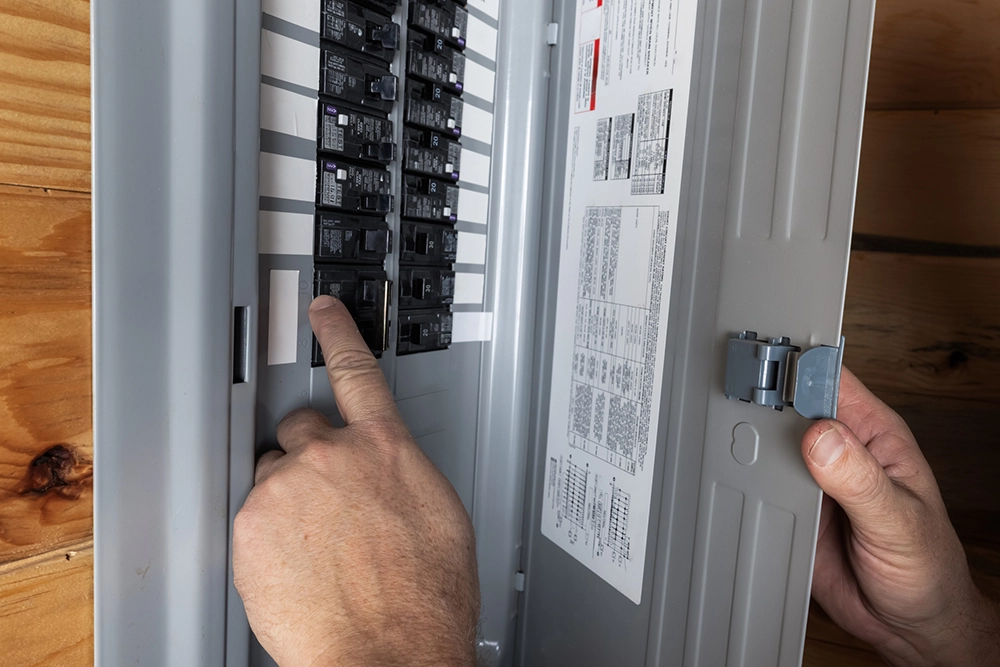
If an upgrade is required
When the calculation shows your home truly needs more capacity, a panel upgrade typically falls in a planning range of $3,000–$5,000 on top of the charger installation.
That is a typical planning range to help you budget, not a quote. We show you the numbers either way so the decision is yours and not a surprise.
Connection method
Hardwired vs. Plug-In: Which Suits Your Setup?
Neither one is universally better. They solve slightly different problems, and the right pick depends on your equipment and where it goes.
| Hardwired charger | Plug-in on a 240V outlet (NEMA 14-50) | |
|---|---|---|
| Connection | Wired directly and permanently to the dedicated circuit | Charger plugs into an installed 240V receptacle |
| Appearance | Typically cleaner and tidier, with no visible plug or box | Visible outlet and plug at the wall |
| Outdoor and higher current | Often preferred or required, depending on the equipment and applicable code | Possible, but the outlet and circuit must be correctly specified and rated |
| Connection points | Fewer plug and receptacle connection points to wear over time | Plug and receptacle are additional connection points |
| Flexibility | Swapping the charger is an electrical job | Charger is removable — easy to swap, service or take with you |
| Best when | You want a permanent, tidy setup, especially outdoors or at higher current | You may move, want to change chargers, or use a portable connector |
Hardwired charger
- Connection
- Wired directly and permanently to the dedicated circuit
- Appearance
- Typically cleaner and tidier, with no visible plug or box
- Outdoor and higher current
- Often preferred or required, depending on the equipment and applicable code
- Connection points
- Fewer plug and receptacle connection points to wear over time
- Flexibility
- Swapping the charger is an electrical job
- Best when
- You want a permanent, tidy setup, especially outdoors or at higher current
Plug-in on a 240V outlet (NEMA 14-50)
- Connection
- Charger plugs into an installed 240V receptacle
- Appearance
- Visible outlet and plug at the wall
- Outdoor and higher current
- Possible, but the outlet and circuit must be correctly specified and rated
- Connection points
- Plug and receptacle are additional connection points
- Flexibility
- Charger is removable — easy to swap, service or take with you
- Best when
- You may move, want to change chargers, or use a portable connector
We recommend based on your charger, the location, the current you need and the applicable code — then explain the trade-off in a couple of sentences instead of a lecture.
Placement
Where Can a Home Charger Be Installed?
Almost anywhere you park, as long as the wiring can reach it safely and the equipment suits the location.
Attached garage
The most common and usually the simplest — often a short, tidy run from the panel to the wall beside your car.
Carport
Works well with outdoor-rated equipment mounted where it stays sheltered and easy to reach from the charge port.
Outdoor wall or driveway
We use equipment rated for outdoor exposure and route the wiring in protected conduit so it looks intentional.
Detached garage
The question is how power gets there. An existing subpanel may have capacity; otherwise a new circuit may need conduit or trenching.
Condo or townhome
Possible where your property rules and assigned parking rights support it. We will tell you what we would need from the HOA or management.
Outdoor and carport installations use equipment rated for exposure, mounted where the weather is less of a factor and the cable reaches the charge port without strain. For a detached garage we review whether an existing subpanel can carry the load before planning conduit or trenching, because that choice affects the price.
Charger compatibility
Your Charger, or One We Supply
Both paths are completely normal, and neither changes how carefully the electrical side is done.
You already bought a charger
Send us the make and model. If it is a major compatible unit, we install it — and we will confirm the circuit it needs, whether it should be hardwired, and what current your panel can realistically give it.
If the unit is a poor match for your car or your service, we say so before installation rather than after, while you can still exchange it.
You would rather we choose
We can supply suitable equipment as part of the project. For quality and value we often lean toward the Tesla Wall Connector and ChargePoint, and other major compatible brands install just as well.
We are an independent installer and do not claim manufacturer certification or authorization. The recommendation comes from your vehicle, your panel and your parking spot.
Two EVs and future-proofing
Planning for a Second Electric Vehicle
Two-EV households are increasingly normal, and there is more than one sensible answer.
- One charger, shared. Often enough when the cars are not both empty on the same night — you simply move the cable.
- Two chargers. Each car plugs into its own station, which is the most convenient option when capacity allows it.
- Power sharing or load management. Where the equipment supports it, two chargers can share the available capacity instead of needing double the service.
- Plan the groundwork now. If a second EV is likely, running conduit and reserving panel capacity during this installation is far cheaper than reopening the work later.
Which of these fits depends on the specific chargers and your electrical service, so we confirm what your equipment actually supports rather than assuming.
Installation day
What Happens When We Install Your Charger?
- 1
Confirm scope and placement
We walk the location with you and confirm exactly where the charger goes before anything is opened up.
- 2
Protect the area and route the wiring
We cover work areas and run the circuit along the planned path, in conduit where that is appropriate.
- 3
Install the circuit and charger
The dedicated 240V circuit is installed and the charger is mounted and connected, hardwired or plug-in.
- 4
Configure the current correctly
The charger is set to the current your circuit and vehicle support — not simply the highest setting.
- 5
Test real charging operation
We plug in your car and confirm it charges as expected before we consider the job finished.
- 6
Document the completed work
You receive photos and documentation of the installation for your records, insurance and resale.
- 7
Coordinate inspection as applicable
Where a local permit and inspection apply, we schedule and coordinate it so you are not chasing anyone.
Many straightforward residential installations are completed in a single scheduled visit. Panel work, trenching, a detached garage, a service upgrade, permitting timelines or other complex conditions can take longer, and we tell you what to expect in the estimate rather than on the day.
Transparent pricing
What Does Home EV Charger Installation Cost?
These are planning ranges to help you budget. They are not quotes — your written estimate comes after we look at your specific home.
Residential Level 2 installation
A standard home Level 2 charger installation.
$1,000–$2,000typical range
- Charger placement and circuit sizing
- Panel and load assessment
- Dedicated 240V circuit installation
- Permit and inspection coordination as applicable
- Testing, setup and completed-work photos
Electrical panel upgrade
Only when the load calculation shows the capacity is genuinely needed.
$3,000–$5,000typical range, when required
- Load calculation and service review
- Alternatives considered first, including load management
- Permit and utility coordination as applicable
What moves the number: the distance and route from the panel to your parking spot, any conduit or trenching, how much panel capacity you already have, the charger hardware you choose, permitting, whether a service upgrade is needed, a detached garage, outdoor routing, and overall site complexity. See what drives installation cost.
No technical homework
Get an Estimate Without Technical Homework
You do not need to know your service size, your breaker ratings or what your car's onboard charger can accept. Send us a few photos and answer some simple questions, and we will work out the technical part.
Photos and simple choices, instead of electrical jargon. If you are unsure about anything on the list, "not sure" is a perfectly good answer.
- Your name, phone, email and installation address
- EV make and model
- Whether you already own a charger (and which one, if you know)
- Garage, carport or outdoor parking
- A photo of your electrical panel
- A photo of the charger location or parking area
- Roughly how far the panel is from where you park
- Detached garage? Yes or no
- Existing 240V outlet? Yes, no, or not sure
- A second charger now or later?
- Any extra photos or comments you want to add
Installed right. The first time.
What Stands Behind Your Installation
A home charger becomes a permanent part of your electrical system. Here is exactly what you can expect after the truck leaves.
- 2-year workmanship warranty on our installation work.
- Manufacturer equipment warranty passes through to you.
- We aim to respond to workmanship concerns within 1 business day.
- No-charge correction of defects caused by our installation work.
- Free correction of inspection issues caused by our installation work.
- Photos and documentation of the completed work.
Where we work
Home Charging Across the Tri-County Area
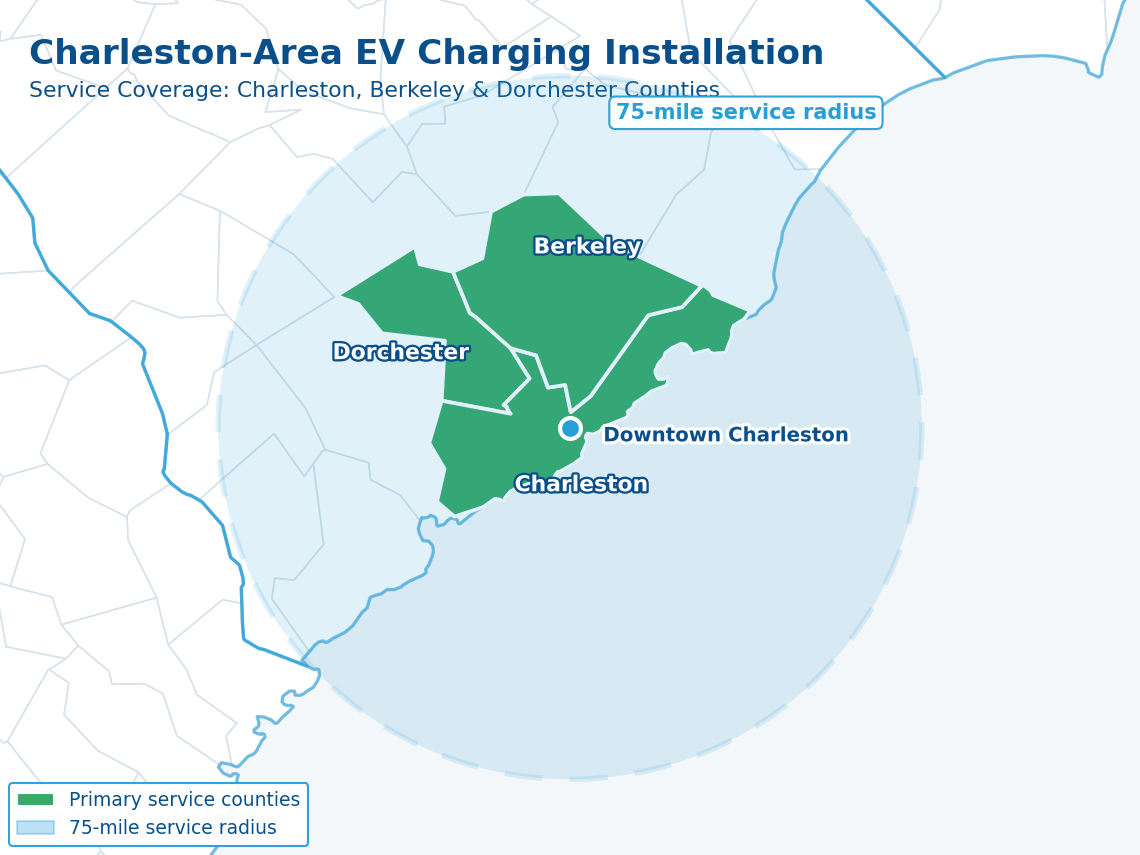
We install home EV chargers throughout Charleston County, Berkeley County and Dorchester County — from downtown Charleston and Mount Pleasant to North Charleston, Summerville, Goose Creek, Moncks Corner and the surrounding communities.
Projects outside these three counties are evaluated individually. Call and we will tell you honestly whether we are a good fit.
FAQ
Home EV charging questions, answered simply
Short answers first. Open Read More when you want the full detail.
- How much does it cost to install a home EV charger in Charleston?
- Residential Level 2 installations typically run about $1,000–$2,000. If a panel upgrade is genuinely required, that is usually about $3,000–$5,000 more. Both are planning ranges, not quotes.
- Do I need a Level 2 charger if my EV came with a charging cable?
- Not always. Some included connectors can also charge at 240V with the right outlet, so send us the make and model and we will tell you what yours supports.
- Can my current electrical panel handle a Level 2 charger?
- Often yes. We run a load calculation and review your service instead of guessing from the panel size or the number of empty breaker spaces.
- Will I need a panel upgrade?
- Many homes do not. Lower charger current, load management or scheduling often close the gap, and we only recommend an upgrade when the calculation genuinely requires one.
- Is a hardwired charger better than a NEMA 14-50 outlet?
- Neither is better in every case. Hardwiring is permanent and typically tidier, and is often preferred outdoors or at higher current; a plug-in setup keeps the charger removable.
- How long does Level 2 charging take at home?
- It varies by vehicle. As illustrative figures, a Level 2 setup delivers roughly 7.7 kW at 32A, 9.6 kW at 40A or 11.5 kW at 48A — usually enough to replace a normal day's driving overnight.
- Can you install an EV charger outdoors?
- Yes. Outdoor installations are common here — they use equipment rated for outdoor exposure and a properly protected route for the wiring.
- Can you install a charger in a detached garage?
- Yes. The main question is how power gets there — sometimes an existing subpanel has capacity, and otherwise a new circuit may need conduit or trenching.
- Can one home support two EV chargers?
- Often yes. Options include sharing one charger, installing two, or using power sharing and load management where the equipment and capacity allow it.
- How long does the installation itself take?
- Many straightforward residential installations are completed in a single scheduled visit. More complex projects take longer, and we tell you which yours is up front.
Wake Up Ready to Drive.
Plug in when you get home, and start every morning with the range you need. That only feels effortless when the charger is properly sized for your car and professionally installed on its own circuit. Tell us about your EV and where you park, and we will handle the rest.
(843) 508-9061 · Monday–Friday, 9:00 AM–5:00 PM
Related pages